Wednesday, March 31, 2010

Hippity Hop Easter "Wear"

Yesterday I went to a blog called Dana-made-it.com. Oh my goodness, I saw THIS and wanted to start sewing! Last night late I visited the site again, just to see her Peeps bunting again and was inspired to make something "peepish" for Sweet Girl to wear to her Easter party and Easter egg hunt at school.

I downloaded Dana's template (found here) for the peep bunny then had to size it down. I cut it out, grabbed a plain white shirt from Sweet Girl's room and a pink and white polka dot sheet I bought at Goodwill (I had already washed it) and made a peep reverse applique like I did for Thanksgiving with the turkey handprint.
I cut and ironed the fabric and pinned it right side up to the inside of the shirt.
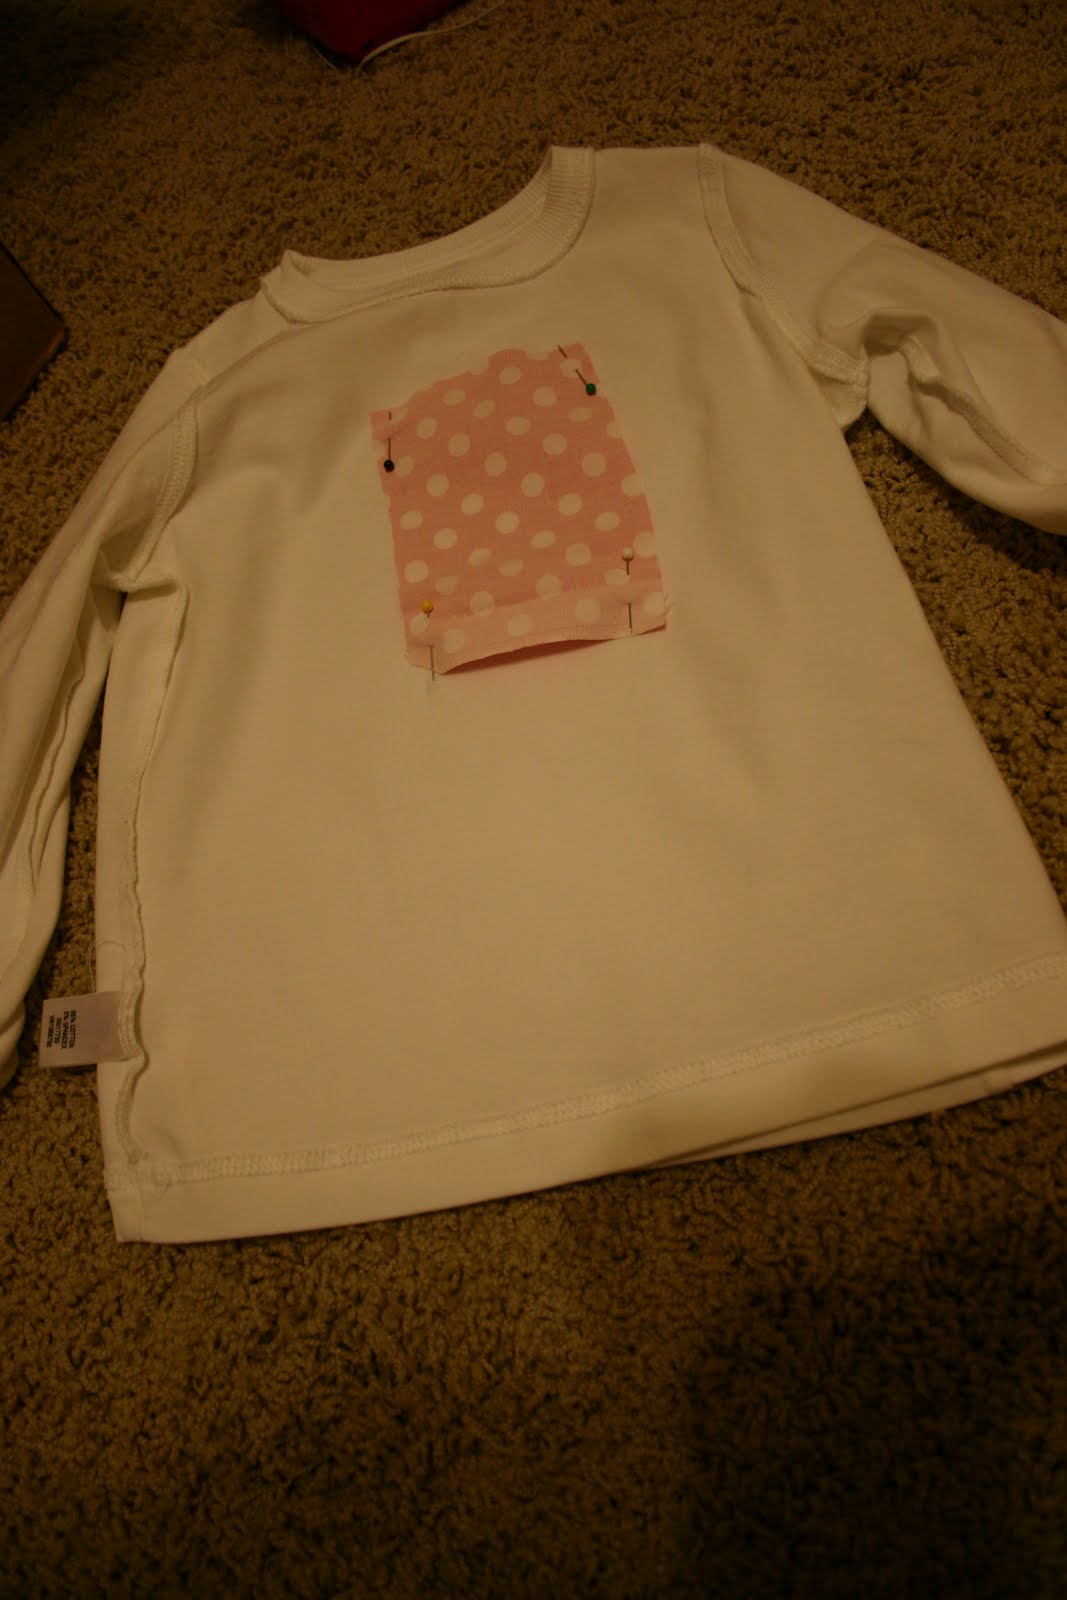
I then pinned the paper peep on the front of her shirt...

and sewed around the paper peep
Can you see the stitch outline?
Then I pulled the shirt up and cut a slit and then carefully, making sure I wasn't cutting the fabric underneath, I cut out the peep.

I thought it looked a little plain though...
so I dug around in my fabric box and came across this trim (I always pick up bits of stuff like this at yard sales and thrift stores for pennies to add to my box of scrap fabric...you'll never know when you can use it!)...

The Bunny looked a little plain so I cut a small piece of sheet and sewed a green button on. Remember I did all this between 9 and 10 so I didn't finish the edges of the strip I used or anything like that.

bunny1

the finished product!

bunny2

I cut another strip to use as a bow for Sweet Girl's hair...

bunny3

I was so excited to wake Sweet Girl up for school and when I did I said "boy I wish you had a bunny shirt to wear to your Easter party today" and would you believe she said "well you could make me one". I squealed and said as I held up her shirt "I did!". :) I'll be filing that one away as a good Mommy moment!

Edited to add: I am linking up to V&Co. I LOVE her blog and strongly suggest you visit if you haven't already.

~Victoria~

Monday, March 29, 2010

Mosely Drive House Tour continues

I know I showed this picture a couple of weeks ago but am showing it again as part of my house tour. This is our dining room/breakfast area. Originally the house had a deck off this room but it had been torn off and the door opening closed up into a window when we bought it. After a few years in the house we added a deck and put the french doors in. It made a HUGE difference in this room giving more light and making the room feel much larger!

t1

In case you are wondering how my dining area ties in with the rest of the house here it is from the kitchen.

t2

(every time I look at these pictures I see all the things I had planned to do, like hang a chandelier,
change out the counter tops and flooring and it pains me that we didn't do it.
I'm telling you people...do these projects NOW. Don't wait! :)

Then there's the Master Bedroom, remember when I talked here about the linens for our bed?


I like the soothing look of the room....

t3

and my Sweet Girl's room...

t4

You can see more details of her room here
Last room on the main floor, our playroom/office. It was rarely this clean. :) You can read about my window mistreatments here.

In our Moseley Drive house we had a full basement that we finished out. We added another bathroom, finished out the laundry room, my husband had a theater room and then there was junk that I stored down there much to my husbands dismay.

It was the perfect house for us to start out in and a dear little place. I have many fond memories of this house and the times we shared in it.

~Victoria~

Wednesday, March 24, 2010

Moseley Drive Tour: Kitchen

Head over to the Just A Girl blog for a Show and Share party today. There are some great things over there. We are linking up Victoria's Moseley Drive kitchen redo. I believe she told me that she has one more post to do on the tour of her old house. I can't wait for you to see the fabulous things that she and her hubby have done to their new house. Those before and afters will come slowly as she is still unpacking and getting her house on the market.-Christina


Original kitchen picture

k1

As with the bathroom, we did not get around to working in the kitchen until the last couple of years and I wish I had done it sooner. As you can see above, our kitchen had the typical 70's wood cabinets which we painted white when we moved in almost 11 years ago. We painted them with oil paint and with a fluorescent light it turned the white paint to a yellowy cream (ick). We needed to repaint but my husband suggested we have new doors made and I convinced him that we should tear down the cabinets separating the kitchen from the dining area.

k2

k3

First step, tear out bank of cabinets that separated the kitchen from dining room. WOW, it really opened things up!

k4

Second step, cut off fancy trim off cornice to give the area an updated look. My husband and father in law used a strip of wood to get their marks...Then my father in law used his saw to cut it off.

k5

k6

When we first moved in, we tore out a cabinet and added a dishwasher. Due to this, the doors to the right of the dishwasher could not have knobs or pulls or the dishwasher door would not open. :)

k7

My fix was to have the cabinet door maker put hand grooves on the new cabinet doors for all the lower cabinets.

k8

Forgot to take a "before" until after we had removed one of the cabinet doors over the stove. Notice the two short doors to the right above the stove.

k9

We had the same guy install a microwave over the stove. It cut into my cabinet space over the stove but I loved having my microwave OFF my counter top!

k10

Everywhere that I could, I had him make 1 long door versus 2 short doors that were there originally.

k11

On the back side of the island originally there was paneling. See that corner under the microwave? It was pretty much inaccessible so....

k12

I had the cabinet maker put 2 fixed doors and then one door that opened so I could access the back corner of the cabinet.

k13

This gave me additional cabinet space and I liked the look better than the paneling.

k14

To help make up for the cabinet space I tore out, my husband and father in law made me these beautiful open shelves. Boo hoo, I will miss these babies! I loved having open shelving.

victoria's white shelves

And after....

k15

I LOVE IT! Love the openness, the arch, having the microwave over the stove and the shaker style doors! I hate to say but we didn't finish our make over. We were going to replace the counter tops and flooring and I had planned to hang a pot rack but we never got around to it.

k16

You are going to hear this from me repeatedly with this Moseley Drive tour. If there is a project you want to tackle (painting your kitchen cabinets, etc) do it NOW. Don't wait! You could be enjoying it for years instead of someone else enjoying it.

More of the Moseley Drive tour:
bathroom redo
living room redo.

~Victoria~


Monday, March 22, 2010

Moseley Dr House Tour: Bathroom

Bathroom with it's original yellow tile walls, yellow floor and yellow counter top...

b1

Here are pictures of the bathroom AFTER we did a small renovation.

b2

b3

First we had the yellow tile painted white by Miracle Method

b14

We replaced the yellow counter top with a neutral counter top, new sink and faucet.

b15

I painted the vanity and put clear glass knobs from Target on it. We had the yellow tile floor torn out and replaced.

b6

We took down the big mirror that was glued on in the 70's and replaced it with a framed mirror from Lowes. You can see my favorite shower curtain from Target in the mirror.

b7

I love the calming effect of the brown and white. I can tell you all that I wish I had done the bathroom sooner!!!! If there is a project in your house that you are putting off because you are unsure of what color to use, how to do it, etc, listen to me closely...DO IT AND DO IT NOW! You will love it. There are things that didn't turn out the way I wanted in this bathroom BUT overall I love it.

~Victoria~

Friday, March 12, 2010

Moseley Drive Tour: Living Room

I wish I had some original pictures from the living room but they are packed away in a box somewhere! When we bought the house the room was painted a mid-gray and it seemed dark and gloomy to me. The room had beautiful hardwoods and crown molding but that was about it.

My Father-in-law and husband put bead board halfway up the wall for me (all while thinking I was crazy to go halfway up the wall) and I loved it!


For about 8 years this is how my living room looked. We bought our first "real" (meaning not thrifted/yard sale or hand me down) piece of furniture after we moved here and it was our sofa. We bought it from Norwalk and it cost a pretty penny. It is a sleeper and a very good quality sofa. I used it for 9 years in our living room and it still looks great and has held it's form wonderfully! Now it will reside in our Bonus room.

lr1

I'll be sad to leave my beautiful bead board and trim.

lr2
Notice my rug in the picture below? It is actually an outdoor rug that I bought on clearance at Bed, Bath & Beyond. I believe it was around $30 for a large 8x10 area rug.

lr3

lr4

By the way, aside from the sofa, rug and bookshelf (Ikea) everything else in this room is thrifted!

Last spring I decided to change things up. It took awhile and I never really felt like I finished the living room but here is what I did.

Painted the living room Aruacana Blue from the Lowes Martha Stewart Living collection and bought the JC Penney Friday Slipcovered sofa at the Outlet for $199 and an Ikea Ektorp Tullsta chair.

lr5

I finally made and put up curtains with help from you all and added pillows from the Boutique commonly known as Goodwill.

The chair in the corner by the TV cabinet was my dumpster find a couple of years ago.

lr6


Remember my TV cabinet I mentioned
here?

lr7

The hardware was what sold me on it...

lr8
or was it the $30 price tag at the yard sale...

knobs

You know, in looking at these pictures I am so glad for my thrifting ways and the fun I have had picking up things here and there to make my house a home.

Tune in for more of the Moseley Drive tour...

~Victoria~